ingridscience

Bridge structures and forces

Summary
Build a beam, arch, girder and truss bridge and compare how much weight they can carry. Discuss their relative strengths in terms of force distribution.
Science topic (2005 curriculum connection)
Physical Science: Force and Motion (grade 1)
Physical Science: Materials and Structures (grade 3)
Materials

For each pair or small group of students:

  • about 10 pieces of paper (quarter sheet of letter paper)
  • 50 glass counters or 100 coins/washers
  • small, light, pots to contain counters e.g. small paper drink cup
  • bridge supports: upside-down trays or tubs of sand or stack of books, about 5cm high. They must stay the same distance apart for all experiments - use pencils wedged between tray structures or strips of masking tape between tubs to keep them correctly spaced
Procedure

Stands alone as a 1.5hr lesson, with a good amount of time for free exploration, ending with looking at photos of local bridges and understanding the Forces in them.

Tell students they will be making different kinds of bridge structures and testing their strength. Bridge supports are tubs of sand or stacks of books. All the bridges are made with the same amount of material - two sheets of paper (quarter of a letter-sized sheet), so that the different shapes can be compared for strength.
For Ks, show them how to make only beam and girder. For older primaries or intermediates, show them how to make beam, arch, girder and truss.

A beam bridge is simply two sheets of paper on top of each other, spanning the bridge supports.
An arch bridge is made by curving one sheet of paper between the two bridge supports, then laying the second sheet of paper over the arch so that it rests on the top of the arch as well as the bridge supports.
A girder bridge (a strengthened beam bridge) is made by folding up the sides of one or both sheets of paper - make sure the students fold the long sides and the folds are across the gap between the supports.
A truss bridge (a strengthened beam bridge) is made by creasing one sheet of paper into an accordion length wise, then laying the second sheet of paper over the accordion - make sure the folds are across the gap.

For each bridge type, test its strength by adding a small pot to the centre of the bridge, then adding counters until the bridge collapses.
If a pot starts to get filled, stack on a second cup, so that the force is still in the same spot of the bridge deck (and not spread out).

Tell students after testing these bridges, they can also make up their own bridge shapes, but to compare their strength to the others, they must also only be made from two sheets of paper.

Students come together to record their results on a class graph. The class results will show the data pattern clearly, even if individual results are not so striking.
It is expected that the beam bridge will be the weakest and the girder or truss bridge the strongest (though depending on the number of creases in the truss this can make a huge difference to its strength). There is a fair amount of variability in the data (though beam and arch bridge data seems to be quite clean), but the highest point can be looked at, or the rough average of the points. the variability in truss bridge strength may be because students make differently-sized folds in their paper.

Discuss the forces in each bridge:
When the load is added to the beam bridge there is force pushing down in one area of the flat surface of the paper, soon bending it. When the load is added to the arch bridge the force is spread out by the arch to the sides, so that less force is experienced in more places. Hence more load can be added before the paper bends.
The folds of the girder bridge direct force sideways and distributes it through the bridge. The truss bridge has triangles underneath, which are strong shapes that do not easily distort and spread the forces out so the bridge can take even more load (though these triangles are not strapped at the top, so are weaker than complete triangles).
(More details on bridge construction and forces at http://science.howstuffworks.com/engineering/civil/bridge.htm)

Look at bridge photos (local if possible):
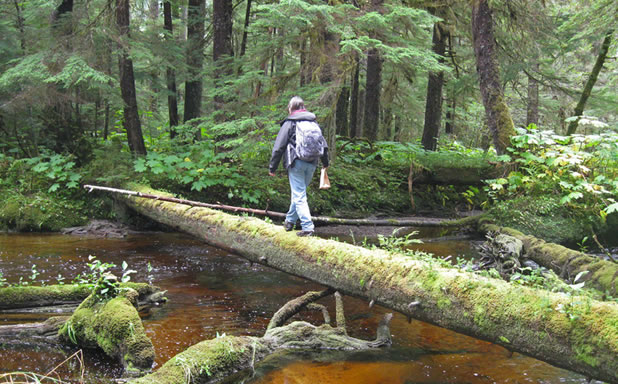
Beam bridge: a log bridge, or plank over a river (see https://afriprov.org/wp-content/uploads/2020/05/aug-1-05.jpg)
Girder bridges: Oak Street, Knight street.
Truss bridges: Granville Street, Burrard Street, Second Narrows Ironworkers Memorial
Arch bridges: Second Narrows
Other bridge shapes not covered with this activity:
Suspension bridge: Lions gate
Cable-stayed bridge: Alex Fraser (longest in the world when built), Port Mann

Depending on how wide the river that the bridge crosses, the materials that the banks are made from, and whether piers can be built in the river, and the cost of the materials, different bridge styles are chosen for each location. For each location the engineers determined the best bridge type. In general, a simple beam bridge is not used for longer bridges.

Discuss the elements that are used to construct a real bridge:
Structural elements are long beams, made of steel or wood. They are rigid and transmit forces along them, to distribute the force of the load throughout the structure.
Fasteners attach the structural elements together: bolts, straps to crimp structural elements together. Welding, gluing and cement are also used.

Ideas to continue experimenting and graphing:
If you build a beam bridge from several stacked pieces of paper, how many pieces of paper makes it as strong as an arch bridge/truss bridge made from 2 pieces? How much more material does the beam bridge need than the other kinds of bridges to be as strong?
Students can design their own bridge structures.

More info on bridge websites:
http://www.historyofbridges.com
http://www.pbs.org/wgbh/buildingbig/bridge/index.html
https://www.explainthatstuff.com/bridges.html
http://www.highestbridges.com

Notes

Using a styrofoam cup instead of little paper cups, which are light, will fit all the counters in one cup. Cups do not have to be stacked up (though this is fun!). Make sure the base of the styrofoam cup is not too wide, so that it is really sitting on the bridge structure and not over the supports.

Grades taught
Gr K
Gr 1
Gr 2
Gr 3
Gr 4
Gr 5
Gr 6
Gr 7

Smelly paintings

Summary
Students use paint with scents added to paint a smelly picture
Science topic (2005 curriculum connection)
Life Science: Characteristics of Living Things (grade K)
Life Science: Human Body (grade 5)
Materials
  • Paint colours with scents added (use food extracts such as lemon, orange, vanilla, almond, banana)
  • Q-tips
  • Thick paper
Procedure

Students use the scented paints to make a smelly painting.
The smell will last for a day or so before fading.

Grades taught
Gr 1
Gr 2

Taste and smell for identifying candy flavours

Summary
Identify flavoured candy by smell or taste alone, to discover that smell contributes significantly to taste.
Science topic (2005 curriculum connection)
Life Science: Animal Growth and Changes (grade 2)
Life Science: Human Body (grade 5)
Materials
  • jellybeans of three identified, familiar flavours
Procedure

Identifying flavour by taste alone:
Tell students what three flavours of jellybeans they will be tasting.
Ask students to close their eyes and pinch their nose shut.
Give them a jelly bean, and ask them to put it in their mouth and chew a couple of times, still with the nose pinched. (Do this for just a couple of seconds as it is hard to make the instinctive swallow with the nose pinched.) Can they identify the jelly bean taste? At this point students might find it hard, as they just taste sweet.
Then ask students to un-pinch their nose and see if they can identify the taste now. As smell molecules from the jellybean pass through their open nasal passage, smells are now detected, and the "taste" should be immediately identifiable.
Summarize: most of the "taste" of jellybeans is actually smell molecules. When they make jellybeans they add smells to a sugar paste. When we chew the smells are released. The colour of jellybeans also cues us into what flavour they are.

Identifying flavour by smell alone:
Tell students what three flavours of jellybeans they will be smelling.
Give a student a jellybean without them looking at the flavour.
Ask them to crush it, or break it in half, then smell it. Can they identify the flavour?
Then they can taste it.
They will likely be able to identify the flavour from smell alone, as the "taste" of jellybeans is determined by the smell molecules added to a sugar paste.

Notes

Note that texture also plays an important part in food experience, so foods with similar textures may need to be used for when students switch roles.

Variation done at NY after school programs: Students work in pairs. One student keeps their eyes closed. The other student offers a food at a time for smelling, then tasting. The blindfolded student tries to guess what the food is before looking. e.g. use raisins, carrots, apple, cheese, banana, orange, potato chips

Grades taught
Gr K
Gr 1
Gr 2
Gr 3
Gr 4
Gr 5

Taste bud observation

Summary
Look closely at taste buds on the tongue. Optional: use food colouring to show them more clearly.
Science topic (2005 curriculum connection)
Life Science: Animal Growth and Changes (grade 2)
Life Science: Human Body (grade 5)
Materials
  • mirror
  • flashlight if the room lights are not bright
  • blue food colouring - 2 drops in 10ml water
  • Q-tips
Procedure

Students dip their Q-tip in the food dye and water, then paint the blue onto their tongue.
Students can look at each others' tongues and use the mirror to look at their own.
They may need to use a flashlight to see properly.

They are looking for the pink bumps on the tongue, that do not stain blue. The blue dye will help contrast them with the surrounding tongue.
Some of the pink bumps (called papillae) contain taste buds, which detect tastes. Some papillae do not, but are used for detecting touch.

There are five established basic tastes, from separate taste buds detecting different molecules or ions:
Sweet detects sugar/protein when they bind.
Sour detects hydrogen ions, when they enter the taste bud.
Salt detects Na+, K+ or Li+ ions when they enter the taste bud.
Bitter from molecules binding a receptor.
Umami is glutamic acid binding a receptor.

Taste buds, which contain the taste receptor cells, are distributed throughout the tongue, on the papillae. All the tastes are found all over the tongue.
Note that the myth that divides the tongue into different areas with different kinds of taste buds is incorrect. (Explanation: the original scientific paper showed tiny differences in detection levels across the tongue, but this was misunderstood and reported in textbooks as a difference in sensitivity.)
Image of the papillae on the tongue, which contain the taste buds at https://basicmedicalkey.com/wp-content/uploads/2016/05/F500414f28-04-97… Taste buds are found on fungiform, foliate and circumvallate papillae, but not filiform papillae (which detect touch).

The tongue can detect other sensations, not classically described as taste: spiciness, temperature, coolness (minty), numbness, astringency, metallicness, calcium, fattniess, starchiness (Wikipedia: Taste)

Different students will have different densities of taste buds.
Super tasters have the greatest density of taste buds, normal tasters have fewer and non-tasters have the least.
(More than about 30 fungiform papillae they are considered a supertaster, if they have around 15 to 30 papillae they are an average taster, and if they have fewer than 15 papillae they are a non-taster. Of world population 25-30% are thought to be supertasters, 40-50% average tasters, and 25-30% non-tasters.)
http://usd-apps.usd.edu/coglab/TasteLab.html
To supertasters, foods may have much stronger flavors, which often leads to supertasters having very strong likes and dislikes for different foods. Supertasters often report that foods like broccoli, cabbage, spinach, grapefruit and coffee taste very bitter. The opposite of supertasters are non-tasters. Non-tasters have very few taste buds and, to them, most food may seem bland and unexciting.

Notes

Food dye stain does not come off for an hour or two (similar to blue candy), so let parents know of activity.

Optional: use paper ring reinforcers to isolate and count a group of taste buds, to determine density: https://www.scientificamerican.com/article/super-tasting-science-find-o…

Grades taught
Gr K
Gr 3
Gr 4
Gr 5
Gr 6

Taste tests for the five basic tastes

Summary
Taste different clear liquids and match them as sweet, salty, sour, bitter or umami.
Science topic (2005 curriculum connection)
Life Science: Characteristics of Living Things (grade K)
Life Science: Needs of Living Things (grade 1)
Life Science: Animal Growth and Changes (grade 2)
Life Science: Human Body (grade 5)
Materials
  • cups to hold tasting liquids
  • Q-tips
  • water to cleanse mouth between tastes
  • sugar solution, 1 Tbspn sugar in 100ml water (for sweet liquid)
  • salt solution, 1/2 tpsn salt in 100ml water (for salty liquid)
  • white vinegar (for sour liquid)
  • baking soda solution, 2 tspn baking soda in 100ml water (for bitter liquid). Or try tonic water
  • MSG solution, 1/2 tspn umami in 100ml water (for umami liquid), or use fish sauce
Procedure

Students in pairs. One student closes their eyes and the other one uses a Q-tip to put one of the tastes on their tongue.

Version 1: students guess which taste type the liquids are (salt, sweet, bitter, sour or umami).
Version 2: students put 6 liquids in pairs by their taste (sour, sweet, salt)

A good opportunity to teach that the tongue is NOT divided into different areas of taste sensitivities.
A good opportunity to introduce tastes other than the familiar 4 e.g. umami. Can also discuss spicy as a taste/pain sensation.

Notes

Version 1 did not work well at all. Students were not able to distinguish well enough to make it fun. (Keep in mind that it was probably not taught well - it was done at the beginning of my teaching experience.)
Verson 2 worked better with 7 year olds, but not with 5 year olds.

Grades taught
Gr K
Gr 1
Gr 2
Gr 3
Gr 4

Chemical reactions with baking soda

Summary
Do a series of activities that mix baking soda and an acid to make gas. Connect by their chemical reaction. Introduce gas pressure by enclosing the reaction and setting off a rocket.
Curriculum connection (2005 science topic)
Physical Science: Properties of Objects and Materials (grade K)
Physical Science: Properties of Matter (grade 2)
Physical Science: Chemistry (grade 7)
Procedure

Baking soda is a common chemical in our kitchen that is an easy grab for chemical reactions.
Selections of these activities can be presented in many different ways.

Suggestions for different lesson plans:

1. Start with making scones. While they are baking figure out what ingredients make the gas, then model it with molecular models.
End with the same reaction in film canister rockets.

2. Start with the familiar baking soda and vinegar reaction. Figure out the chemistry with molecular models.
Try mixing the baking soda with other acids to make the soda drink.
Enclose the same chemical reaction to shoot off a film canister rocket.

3. Start with soda drink., then use molecule models to figure out the reaction. Include other juices.
The same chemical reaction can be enclosed to set off a film canister rocket.

Notes

Other baking soda expts: collect CO2 gas over water and put out a candle; invisible ink (1:1 baking soda:water, then heat or add indicator dye)

Science club did #1
Laurier and ingridscience afterschool did #3
ingridscience afterschool did scones then black snakes
Tyee and CAGIS did #2. Other activities were added to the end of these lessons: at Tyee, stomp rocket for more on pressure. With CAGIS, somewhat randomly, I added bubbles activities, to explore the chemistry of why bubbles are made. CAGIS attendees had a name tag showing all the molecules visited during the workshop.

Grades taught
Gr K
Gr 1
Gr 2
Gr 3
Gr 4
Gr 5
Gr 7

Soda drink

Summary
Mix juice (containing acid) with baking soda. The reaction produces CO2 gas, which makes the juice into a fizzy soda. For older students, use different juices which vary in their acidity and produce different amounts of gas.
Science topic (2005 curriculum connection)
Physical Science: Properties of Objects and Materials (grade K)
Physical Science: Properties of Matter (grade 2)
Physical Science: Chemistry (grade 7)
Materials
  • orange juice (room temperature works best)
  • small dixie cups/plastic cups, one per student
  • baking soda, a small cup. Kindergarten students might need their baking soda pre-aliquotted into tubes.
  • coffee stir sticks, which are used as a scoop and stirrer. tiny scoops (~1/16tspn) can also be used to add the baking soda to the orange juice for more consistent results
  • If doing Procedure B (comparing different juices), you will need additional fruit juices, each juice in a squeeze bottle. Include lemon juice (not sugared), and apple juice, as well as the orange juice. Optionally include cranberry juice.
  • Procedure B also needs 15ml tubes (one per juice) and a rack for each student group
  • optional: molecule models, or equivalent (e.g. clay and toothpicks). You will need 2 white H atoms, one black C atom, 3 red O atoms and 6 bonds to model one reaction.
Procedure

Procedure A makes a soda drink with orange juice and baking soda. The students find out where the bubbles come from. Good for all ages.
Procedure B compares the amount of bubbles made when baking soda is added to different juices. Students learn about acidity. Best for intermediates.

Procedure A. Make soda drink:
Fill a dixie cup with juice. Drink a little of it to see what it tastes like before the experiment.
Scoop up about 1/8 teaspoon of baking soda, using a tiny scoop or a coffee stir stick. Tip it into to the cup of juice and stir it in. Look carefully for tiny bubbles rising to the top of the liquid. Listen for bubbles popping on the surface (quiet is needed to hear them). Taste the juice again - the juice should be fizzy.
Discuss the state changes during this chemical reaction: a liquid and a solid produced a gas. The gas bubbles stayed in the liquid, to make the drink taste fizzy.
The specifics of the reaction can be discussed: the bubbles are carbon dioxide, formed by the chemical reaction between an acid (the juice) and a base (the baking soda).

Optional molecule modelling of the reaction:
Give students molecule models of the molecules in baking soda and orange juice. Ask them to figure out the new molecules that are made when the baking soda and orange juice mix, by taking apart these molecules and rearranging the atoms to make new molecules. Give them a hint that one of the new molecules is water (show a model), and ask them to use up all the rest of the atoms and bonds to make the other molecule.
HCO3 (baking soda) + H (orange juice) —> H2O (water) + CO2 (carbon dioxide gas)
See the molecule photo above. Note that the CO2 molecule has two double bonds - students may need prompting to fill up all the holes in the atoms to complete this molecule.
Once all students have made their water and CO2 molecules, name the carbon dioxide molecule and ask if students have heard of it. Tell them that it is a gas, and this is what makes their soda drink fizzy.
The chemical reaction they just modelled, is the same as what is happening when they make orange juice and baking soda to make their soda drink.

Further discussion on soda drinks and acidity:
Canned sodas are fizzy because they have carbon dioxide gas in them. Soda fountains inject carbon dioxide gas into drinks.
Anything that has free H atoms (ions) is acidic and tastes sour. The more sour it tastes the more H ions it has e.g. lemon juice has more H ions than orange juice. We add sugar to drinks to mask the sour taste.

Procedure B. Make soda drink, then compare different juices:
Start by making a soda drink with orange juice, as in Procedure A.
Students use molecule models to figure out the chemical reaction that made the bubbles of gas:
Give them the starting molecules, and ask them to rearrange the atoms and bonds to figure out what molecules are made (given them a hint that one of the end molecules is water).
HCO3 (in the baking soda, or base) + H (in the juices) —> H2O (water) + CO2 (carbon dioxide gas)
See the molecule photo.

Then compare different juices for how many bubbles they make with baking soda:
Some juices have fewer H atoms in them, so when baking soda is added, they will make fewer CO2 molecules. Therefore fewer gas bubbles are made. Juices with more H atoms in them can make more CO2 molecules, so will make more bubbles of gas.

Give student groups squeezy bottles of the juices, three 15ml tubes in a rack (one tube for each juice type), baking soda in a pot with a mini scoop, and optionally a workhseet (see attached document; print double sided; half sheet each).
Students write on some paper under the tubes to record which juice will go in which tube, then add 5ml each kind of juice to its respective tube.
They then add one mini scoop of baking soda to a juice, use a stir stick to mix the contents quickly, then remove the stick. Use the numbers on the side of the tube to record where the bubbles rise to for each juice type.

While allowing students to keep experimenting with mixing different juices, bring each group in turn to the board to graph their single-juice results, juice type on the x-axis and ml the bubbles rise to on the y axis. There will be variation between the groups, but that is expected with real data collection, and outliers can be used to demonstrate how data is rarely completely tightly grouped.

Class discussion while looking at the graph:
Which juice makes most bubbles [lemon juice], which the least [apple juice]?
Refer back to the chemical reaction: the juice that makes the most bubbles of carbon dioxide must have the most H atoms in it (as the amount of juice and baking soda was the same each time - the only thing that changed was the kind of juice, hence the number of H atoms). Hence the lemon juice has more (or a greater concentration of) H atoms in it, apple juice the least, and orange in the middle.

The number of H atoms in a juice determines how acidic it is, which is the same as how sour it is.
So fewer H atoms means less acidic and less sour. And more H atoms mean more acidic and more sour.
Which juice would you predict is the most sour? (The one with the most bubbles, as it would have more H atoms.)
Students can taste each juice to test if the juice with the most bubbles is also the most sour. Lemon juice will certainly be very sour, and apple juice not sour. A complication is that sugar is added to juices to offset the sourness, so cranberry juice, which is very acidic, and will make lots of bubbles, may not obviously taste the most sour. Students may be able to detect the sourness of cranberry juice behind the sweetness.

After looking at the graph together, or while groups are bringing their data to the graph, allow students to experiment with mixing juices to compare bubbles made. Encourage them to think about how much of each juice they are adding and make predictions about the bubbles that will be made.

Attached documents
Notes

Try with lemonade - may be a way yummier soda drink. (Also students first think of lemon when asked to brianstorm sour things.)

Adding too much baking soda makes the drink taste funny.

Purchase molecule models online at Indigo Instruments https://www.indigoinstruments.com
One set to model the chemical reaction above requires:
2 hydrogen atoms #60110E (1 Hole 17mm White Atom) 45 cents each in 2017
3 oxygen atoms #60200E (2 Hole 105 Degree 23mm Red Atom) 59 cents each in 2017
1 carbon atom #60400E (4 Hole tetrahedral 23mm Black Atom) 67 cents each in 2017
6 bonds #61013E (Molymod Double-Triple Bonds) 19 cents each in 2017
Get at least one set per student pair and several extra atoms of each type and 10 or so spare bonds.
For 15 sets plus spares you'll spend about $100 with tax and shipping.

Grades taught
Gr K
Gr 1
Gr 2
Gr 3
Gr 4
Gr 5
Gr 6
Gr 7

Electricity

Curriculum connection (2005 science topic)
Physical Science: Electricity (grade 6)
Type of resource
Book
Resource details

By Wendy Baker and Andrew Haslam (written by Alexandra Parsons). Two-Can Press. Make it Work series.

Herb necklace

Summary
Students choose a herb to make into a smelly necklace.
Science topic (2005 curriculum connection)
Life Science: Characteristics of Living Things (grade K)
Life Science: Plant Growth and Changes (grade 3)
Materials
  • Fresh herb leaves
  • Small clear tube per student
  • Necklace thread per student
Procedure

Students choose a herb that they like.
Take one leaf (or a couple of smaller leaves), roll them to crush them a little, and stuff them in the tube.
Hang the tube on the necklace.

Notes

Good to pair with a herb smell activity.

Add the name of the herb to the necklace, and maybe the molecule image for older student.

Grades taught
Gr K
Gr 1