Solar System to scale
- printed image of the sun, 10cm in diameter
- modelling clay in these colours: grey, red, orange, blue, white, brown, green; or colours that can mix to make them
- rulers showing mm
- metre stick or tape measure
Before the class, map a route that extends from the classroom to 300m away, using streets that keep the route on a straight line as possible.
Google maps has a "measure distance" feature which works well for mapping the route and the location of each planet.
Inform students that we will make a 1:10,000,000,000 scale model of the solar system. Discuss what a scale model is if necessary.
Together with the students, write up the planets in order.
Stick the sun image to the board, and ask students that if the sun in our model has a 10cm diameter, what's their guess on how large would the other planets be? Add the scaled dimension of each planet to the list, while discussing relative sizes of the planets.
Assign each table group to one planet, that they will make to scale. (The inner planet or two can be done by the teacher to demonstrate the method if there are more planets than student groups.)
Either give them a sheet showing the planets' colours, or list the planets' colours from students' knowledge.
Then distribute the modelling clay colours that the students need to make their scaled planet. If they use a couple of colours, the larger planets can have a swirly pattern that mimics the planet's appearance.
| Sun/Planet | Clay colour | Size | Scaled distance from sun |
| Sun | (Printed image) | 10cm | - |
| Mercury | dark grey | 0.5mm | 4m |
| Venus | red | 1mm | 8m |
| Earth | blue | 1mm | 11m |
| Mars | red | 0.5mm | 16m |
| Jupiter | red-brown | 1cm | 56m |
| Saturn | light red-brown | 8mm | 103m |
| Uranus | light blue | 3mm | 206m |
| Neptune | dark blue | 3mm | 323m |
Distances calculated using https://www.exploratorium.edu/ronh/solar_system/
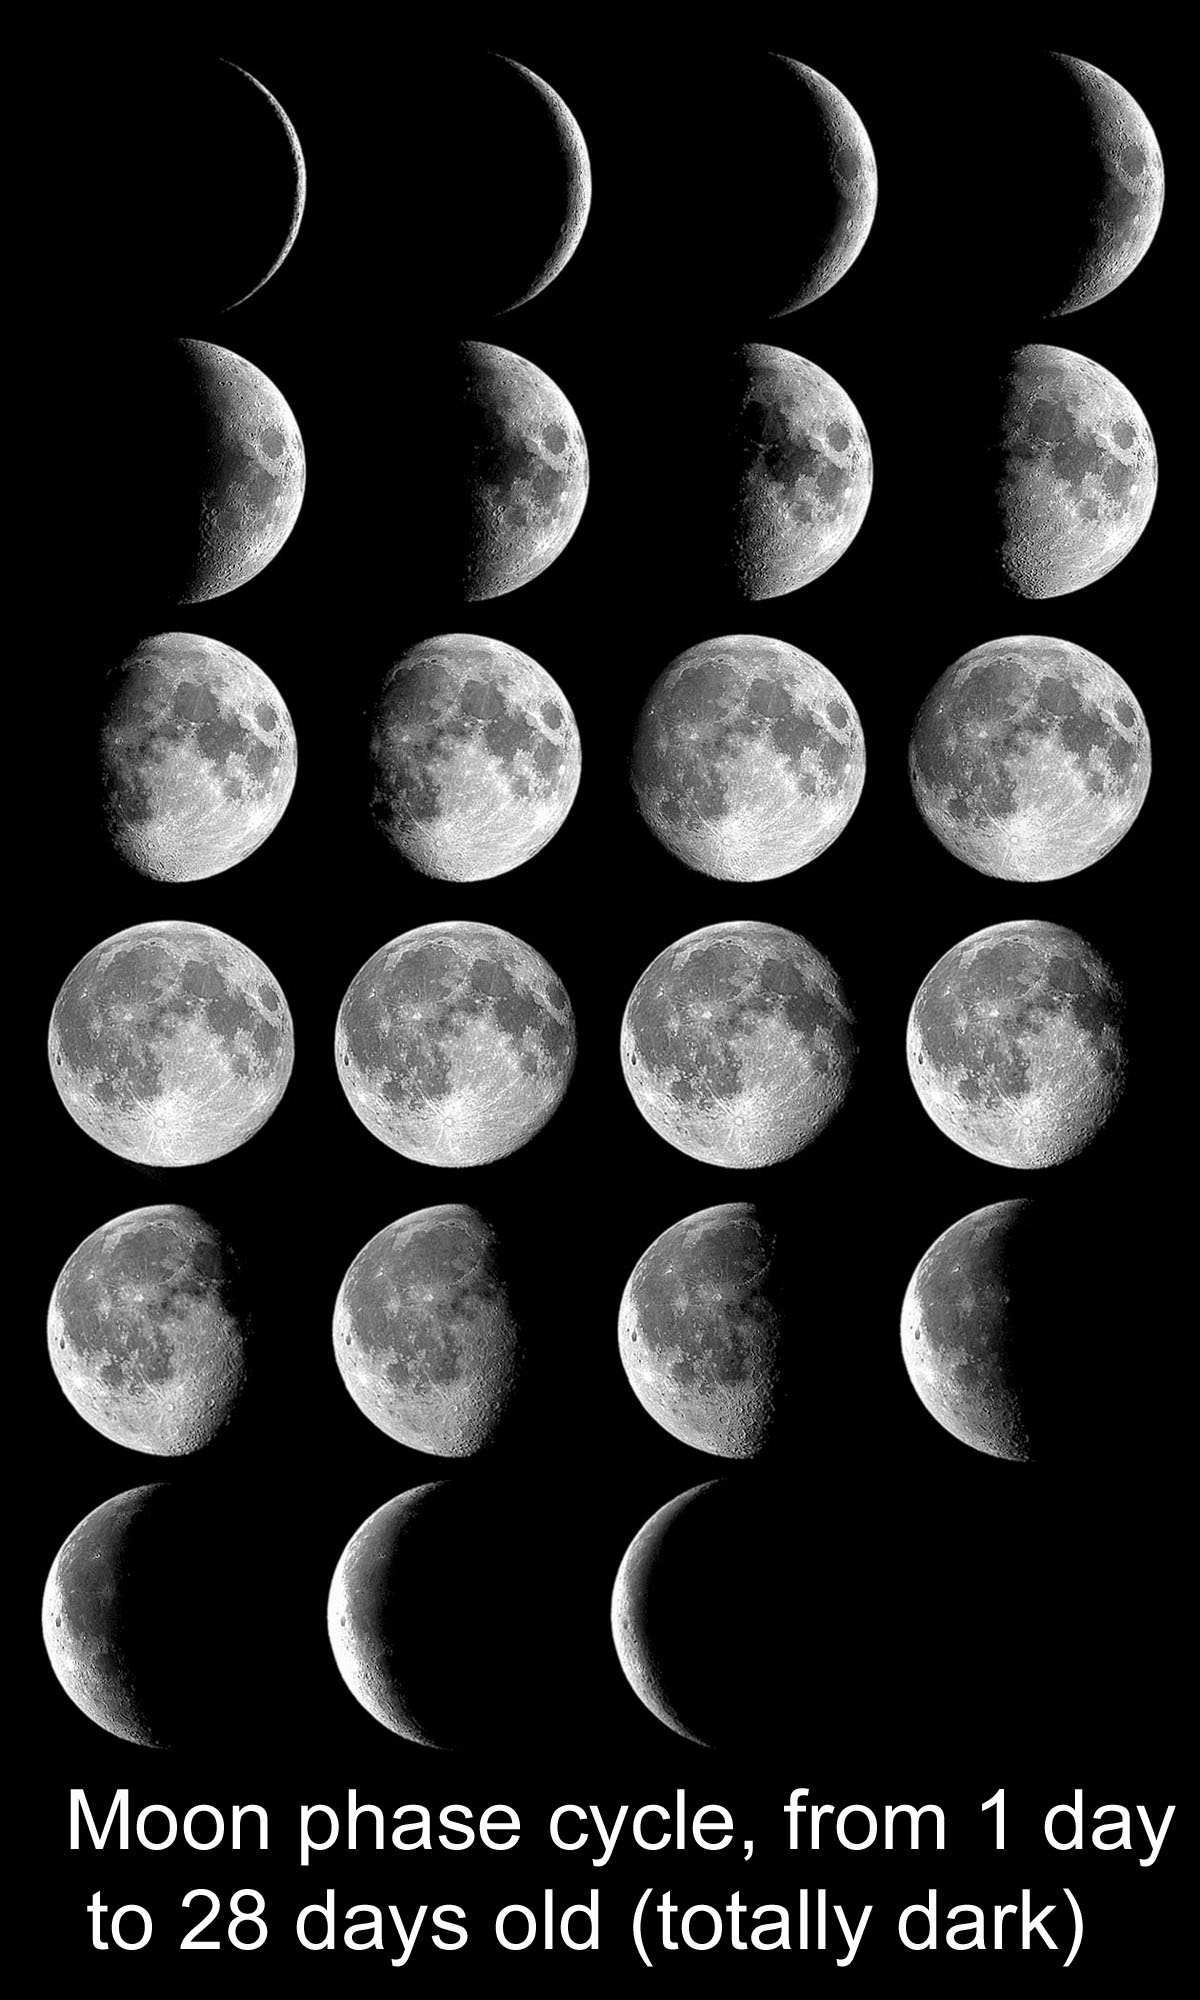
If you want to add in Earth's Moon to scale, its diameter is 0.2mm and it orbits 2.5cm from Earth. Other planets have moons too.
(See this activity for modelling just the Sun, Earth and Moon to scale.)
Once their planets are made, discuss and fill in the scaled distance from the sun to each planet.
Ask students to fold their planet into a piece of scrap paper (so that they don't get lost) and to write their distance on the outside of the paper.
Using the metre stick or tape measure, have the students calibrate their pace to a metre.
Group by group, the students pace from the sun and out to each planet in turn, pacing out the metres. The rest of the class follows the planet that is being placed.
After only one or a couple of inner planets, the scale model will leave the classroom and head outdoors. The outer planets will be off the school grounds into a park or street beyond.
Other features to optionally include on the walk: the Asteroid belt is between Mars and Jupiter and the Kuiper belt (which includes Pluto) is beyond Neptune.
Once at the final planet, pause to reflect on how far the group has walked, how tiny the planets are on the way, and that between them is empty space.
Walking back along the route, and finding the tiny planets along the way reinforces how large the solar system is and how small the planets are in it.
Information on classes of objects that orbit the sun
Planets - now 8 planets, as Pluto is now classified as a dwarf planet. To be a planet, an object needs to 1. be massive enough to pull itself into a sphere under its own gravity 2. is not massive enough to cause thermonuclear fusion (like a star) and 3. has cleared its neighbouring region of smaller objects i.e. they are attracted by its gravity.
Dwarf planets - large enough to be spherical, but too small to clear their neighbourhood of smaller objects. There are many many dwarf planets orbiting the sun, and more are continuously being discovered. Examples: Ceres in the asteroid belt, Trans Neptunian objects (TNOs) such as Pluto, Eris, Makemake, Haumea. Try this page for images of their orbits: http://cnx.org/resources/66fc832ba8fa89f299d718228e06c7cb0ad85924/OSC_A… and this page to show more dwarf planet orbits: http://www.duncansteel.com/archives/2140
Asteroids - small irregularly shaped objects made of rock, metal or a mixture of both, found in the asteroid belt. Image of main asteroid belt at: http://www.rawscience.tv/wp-content/uploads/2014/09/asteroid-belt.jpg
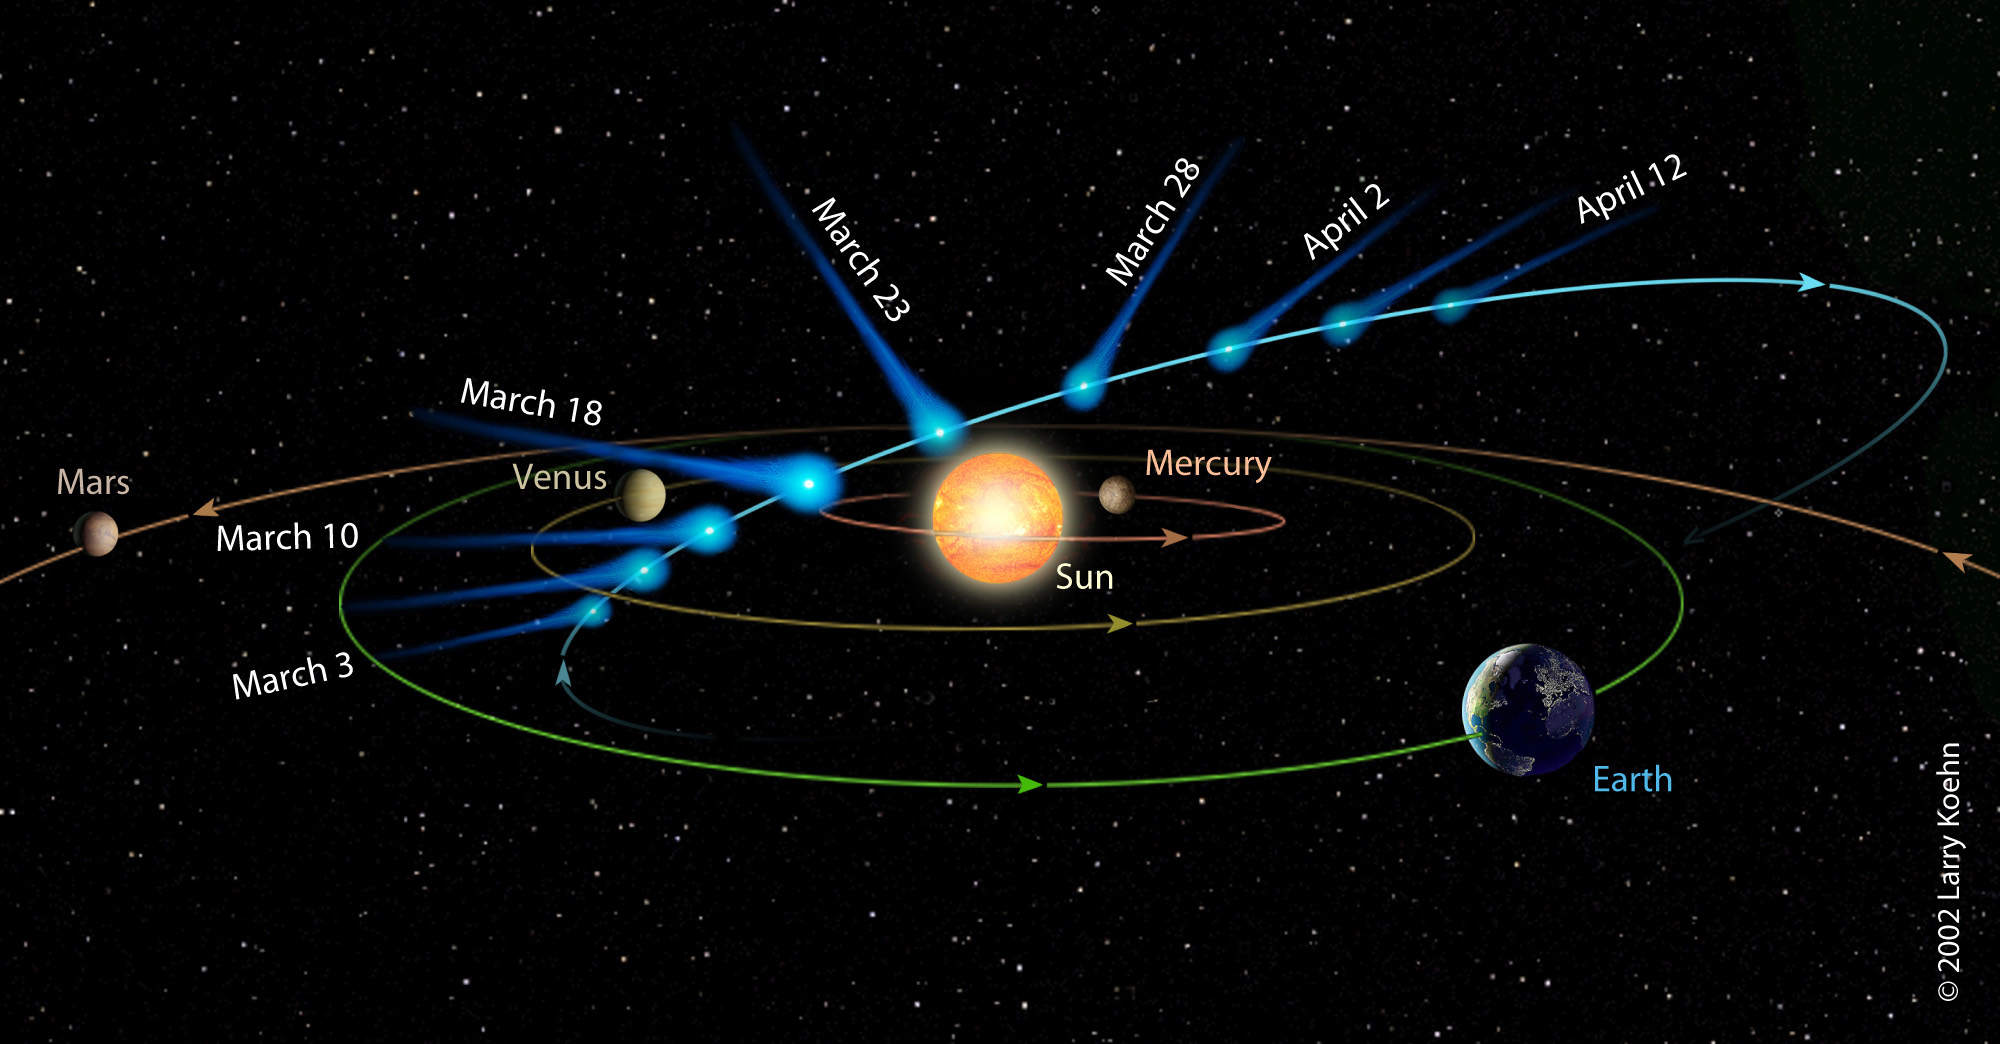
Comets - snowballs of frozen gases, rock and dust the size of a small town. A comet warms up near the sun and develops a coma (atmosphere), a glowing head, hundreds of thousands of km across. It has two tails (which always point away from sun), one gas and one dust (which curves with sun’s gravity). Image of comet structure through its orbit: http://www.skyandtelescope.com/wp-content/uploads/Koehn_IZ_orbit_300dpi… Comets may have brought water and organic compounds (the building blocks of life) to Earth and other bodies in our solar system. There are billions of them. Image of some comet orbits at: http://www.wired.com/images_blogs/wiredscience/2013/08/Orbits_of_period… (Orbit times: Halley orbit is 76 years, Borrelly orbit is 7 years, Ikeya–Zhang orbit is 366 years and is the longest known orbital period.)
Scroll through screens to see planets and moons to scale at https://joshworth.com/dev/pixelspace/pixelspace_solarsystem.html