States of matter (and temperature) in Water
- Bag of ice cubes
- Electric kettle, preferably with transparent sides so that the water can be seen boiling inside
- Glass lid to hold over the kettle. Alternatively, a glass bowl that can fit over a cup of hot water)
- Thermometers
- Coffee cups to contain hot water
- Styrofoam cups to hold ice
- Tongs to hold thermometer over kettle
States of matter in water demonstration
1. Here is an ice cube (or give each student one). Is it solid, liquid or gas? Why? Fixed size, fixed shape.
What is happening to it? Melting. It is changing to a liquid because it is getting warm in the hand. The molecules are moving apart enough that they can flow past each other and make drips of liquid.
The name for a solid changing into a liquid is Melting.
2. Now we start with liquid water. We can turn it into a gas by warming it up even more - give it more energy. Use a see-through kettle or a hot plate to boil water.
What is happening to the liquid? Bubbles of gas are forming in it. It has enough energy to heat it up enough to turn to gas. The name for a liquid turning into a gas is Evaporation. (Alternatively, spread a drop of water on black paper and in a warm classroom or in the sun you can watch it evaporate.)
3. Now we will turn the gas back into a liquid by cooling it down. Put a glass lid/bowl over steam escaping from hot water - see droplets of water forming inside the glass. Why do the drops form on the glass? Because it is cooler, and they lose enough energy to move more slowly and become water again. The name for a gas turning into a liquid is Condensation.
4. How can we make the liquid turn back into a solid?
Cool it down even further. Optional: make frost on the outside of a can: www.ingridscience.ca/node/227 (set up at the start of the lesson - it takes 15 mins to form). Name for a liquid to a solid is Freezing.
Measure the temperature of water in each state
1. Measure the temperature of ice:
Half fill a styrofoam cup with ice cubes, then immerse a thermometer in it. Read the temperature once it has stabilized (maybe a few minutes). If the thermometers are properly immersed in the ice they should read 0°C or below. Students can add their temperature reading to a graph on the board. Explain that ice forms at 0°C and remains solid at any temperature below that.
2. Measure the temperature of liquid water:
Pour water into coffee cups by mixing boiling and cold water to vary the warmth of the water in each cup. Ask students to measure the temperature of their water, and add it to a graph on the board. All measurements should read between 0°C (the melting point of water) and 100°C (the boiling point of water).
3. Measure the temperature of liquid water boiling:
This should be a demonstration. Using heat proof tongs, hold a thermometer just above water as it comes to the boil. Ask one student to read out the temperature as it rises to 100°C (the boiling point of water). If the thermometer can be held in while it continues to boil it may rise above 100°C, as more and more bubbles of gas form within the water.
4. Graph the temperature data. Liquid water will always be between 0°C and 100°C. Ice will be at or below 0°C. The gas in boiling water can be above 100°C.
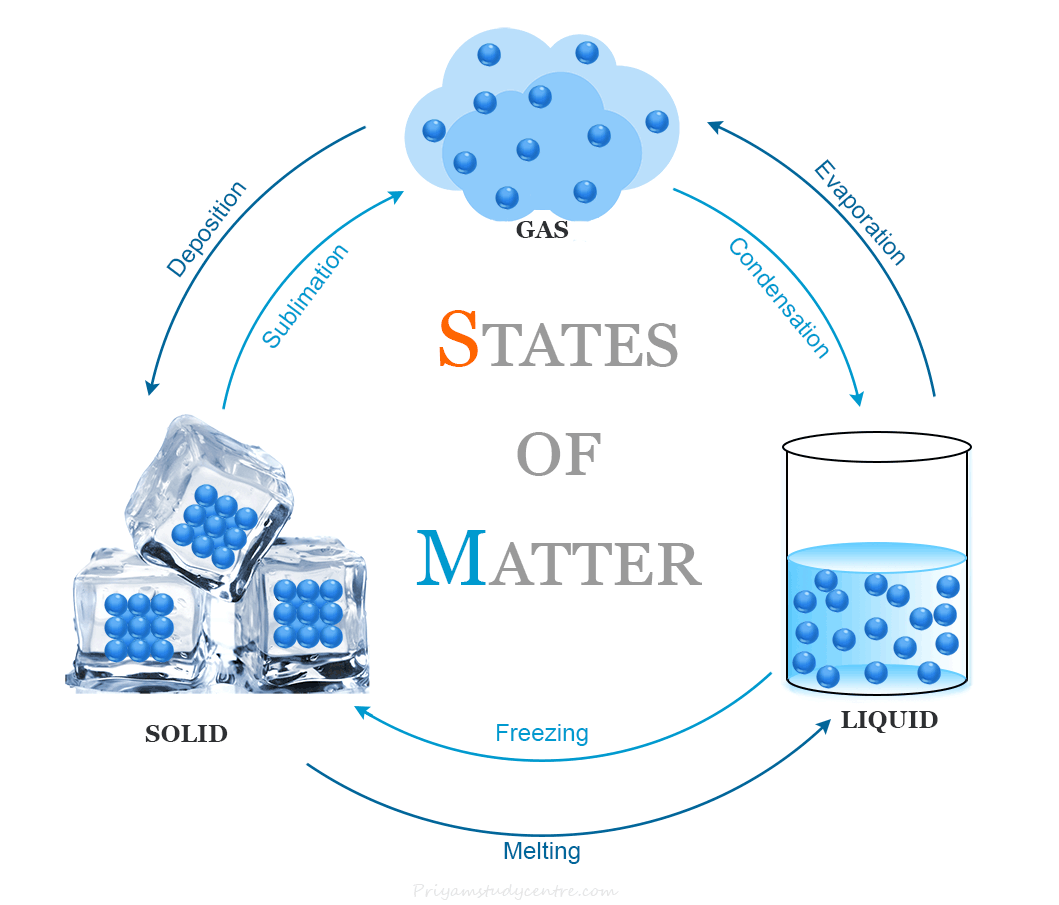
Image of particles in solids, liquid, gas and the names of the phases changes:
https://www.priyamstudycentre.com/wp-content/uploads/2023/09/change-of-…