Lever for lifting (heavy) things
See saw or lever to lift rock
- 2X6 or 2X8 plank of wood
- split log for the fulcrum
- heavy concrete block, or students can lift each other, or rock (see photo)
Lifting a marble up high
- small chair
- light, strong 4ft rod e.g. 5/16" diameter wooden stick
- two small hooks, secured at each end of the rod, facing the same way
- about 50cm string for lashing rod to chair
- bucket - handle may be too high so replace with shorter string handle
- jug for carrying water
- sink
- tray to catch spills under the bucket
- small pot e.g. dollar store plastic shot glasses
- marble
- masking tape
- cloths and mops for spills
See saw
Set up the see saw with the 2X6 centred on the split log.
Ask a pair of students to experiment with the see saw. They can either lift a large block (in the photo), or they can try lifting each other. (The objects are heavy, so the students should work slowly and carefully with good communication within the pair). Prompt the students to move the fulcrum and see what difference it makes.
They should find that when the fulcrum is near the load/student, they are easy to push it up in the air, but when it is far from the load, it is very hard (if not impossible).
Students can draw what they discover using standard notation:
The lever arm (plank of wood) is drawn as a straight line, and the fulcrum is a triangle under the line in the correct position. Use arrows to show where force is applied (at one end of the see saw - also called the effort), and where the resulting force is felt (under the concrete weight - also called the load).
Ask the students how the height of the ends of the see saw varies as the fulcrum is moved. They can measure the distances for more accurate recording of the results.
Less force over a greater distance (with the fulcrum near to the weight) is an easier way to lift the weight. However, in this case the weight will not move as high.
The amount of work balances: less force over a greater distance (at one end of the lever) balances more force over a smaller distance (at the other end).
Lifting a rock
Use a long 2X6 or 2X8 as a lever, and a split log as a fulcrum. If students have already experimented with fulcrum placement, ask them to tell you where the fulcrum should be placed to lift a very heavy object [it should be placed very near the rock]. With this arrangement a large rock can be lifted up a few centimetres (higher could be dangerous incase the rock slips sideways) by a child.
Optional: show photos of how people have been using levers for lifting heavy things for thousands of years.
Egyptians used long sticks as levers to move stones e.g. when making pyramids, evidenced by mortises (holes in stones placed for lever use). Try this image link:
https://krisdedecker.typepad.com/.a/6a00e0099229e8883301310fcb6a12970c-…
Indigenous North West Coast large houses are built using levers to raise the massive cedar logs. See page 113 of "Knowing Home: Braiding Indigenous Science with Western Science, Book 1". Try this link: https://greatbearrainforesttrust.org/wp-content/uploads/2018/05/Knowing…
Archimedes proved by math and geometry how a lever functions, and was quoted as saying "Give me a place to stand and I shall move the world". Try this link for a famous etching: http://www.thwink.org/sustain/glossary/images/LeveragePoint_ArchimedesL…
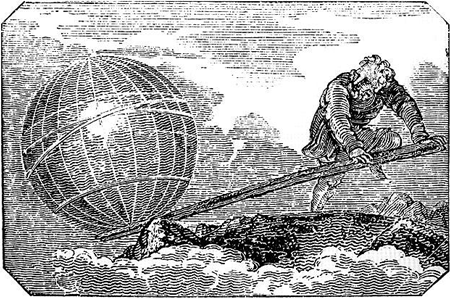
Lifting a marble, or small load, up high
Can also use to lift a smaller weight high with a heavier weight - see the photo of the upturned chair supporting a lever.
A pot of water is used to lift a marble up high - students were challenged to use a pot of water to lift a marble to table height.
The marble can be successfully lifted when the fulcrum is very near the bucket of water, so that the other end holding the marble can swing up high enough to reach the table top.
Review how a lever works: a lot of force at one end moving a small distance (the bucket full of water) produces a smaller force over a greater distance at the other end (hence the lighter load of the marble can be lifted high enough to reach the table top).
Relate to other levers students might be familiar with e.g. see saw.